
Do you have difficulty scheduling meetings with your colleagues and others outside of your organization? You’re not alone. Finding a meeting time that works for everyone is an issue that can take multiple days and long email threads to resolve. Thankfully, there’s an Outlook add-in for that.
Microsoft FindTime is an add-in that allows organizers to select and propose meeting times, poll attendees, and automatically schedule meetings based on poll results. FindTime is available for free for anyone with an education or workplace Microsoft 365 account, and the add-in works on the web, desktop, and Mac version of Outlook.
In this blog post, I will show you how to use FindTime using a combination of screenshots and instructions. By the end, you’ll be a whiz.
Install Microsoft FindTime
To install FindTime on your Outlook Desktop, open Outlook then go to Home and Get Add-ins. Then type FindTime in the search bar and select Add. You should then see the orange FindTime icon in the Home tab.
Start a Meeting Poll
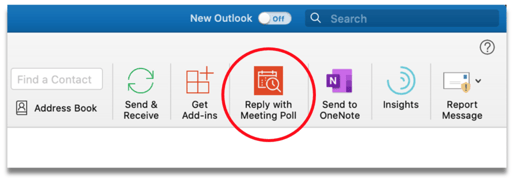
You can begin a poll two ways: by replying to an email or by starting a new email thread. When replying to an email, select Reply with Meeting Poll on the top-right corner of the email.
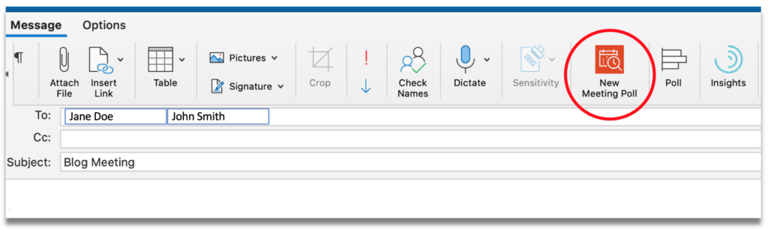
If you’d rather start fresh, open a new email and add message recipients. Write your email subject, then click on New Meeting Poll as shown below. (You may have to click the right arrow on your tool navigation bar to see the icon.)
A sidebar will open on the right-hand side of the email. Select the duration of your meeting and choose the days and times of the week that work best for you. You can scroll through the months and days by clicking on the arrows.
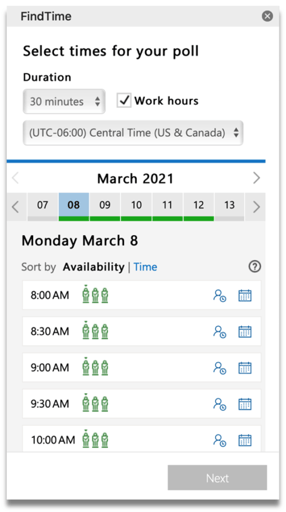
You can sort each of the time slots by attendee availability or by time. The green line underneath the day indicates the best days to meet. The people icons and their colours represent attendee availability for that particular time slot, but only for the people within your organization.
Here is what the people icon colours mean:
- Green – Available
- Purple – May be busy
- Red – Not available
- Grey – Availability unknown
When you click on the calendar icon on each time slot, you will see what’s scheduled on your personal calendar before and after the proposed meeting.
Once you’re happy with your meeting selections, click Next and insert the location of the meeting. Underneath, you will see a number of poll settings.
Here is what the poll settings mean:
- Notify me about poll updates – Receive an email anytime someone votes or suggests a new meeting time. The email will include the current poll status and an option to schedule.
- Schedule when attendees reach consensus – Allow FindTime to automatically schedule the meeting that works for all voters and place it onto your calendar as an event. If multiple options are available to attendees, FindTime will schedule the earlier option.
- Hold selected times on my calendar – Put tentative meetings on your personal calendar for each proposed meeting. Once a meeting is booked or canceled, the placeholders will disappear.
- Lock poll for attendees – Prevent attendees from suggesting new poll times or adding other parties to the meeting.
- Email notifications in FindTime language – Receive email updates in the same language that you use FindTime in. The default language is English.
- Require attendees to verify their identity – Prevent anonymous voting and ask attendees to authenticate before casting their vote.
After choosing your poll settings, review your proposed meeting times. If you realize one time doesn’t work for you after all, you can simply remove it by clicking the X on the time slot.
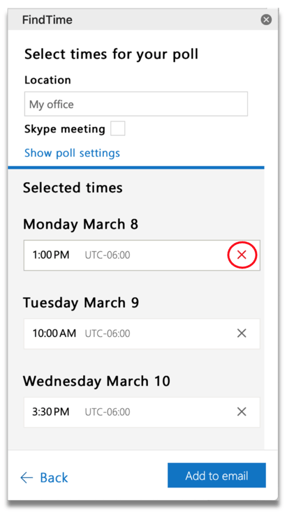
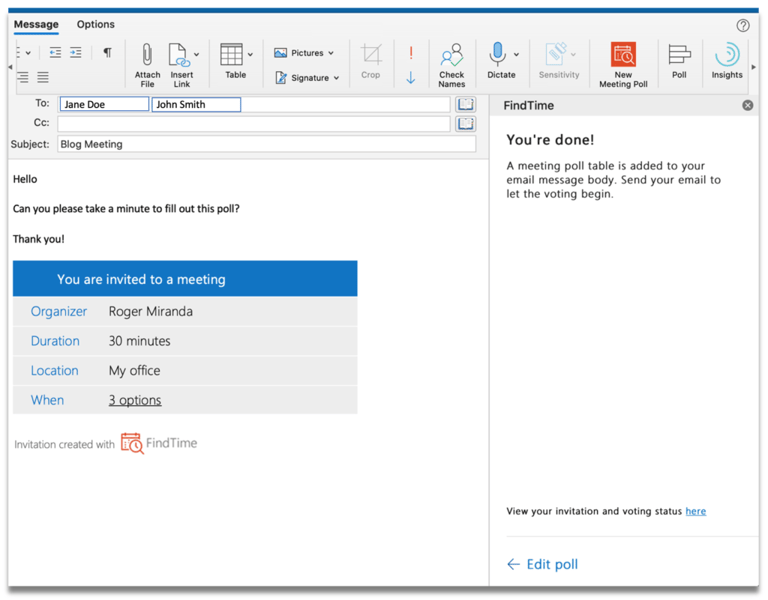
When everything looks set, click Add to email to insert the meeting invitation and poll in the body of the email. Feel free to add a message before sending to recipients.
Review Sent Meeting Polls
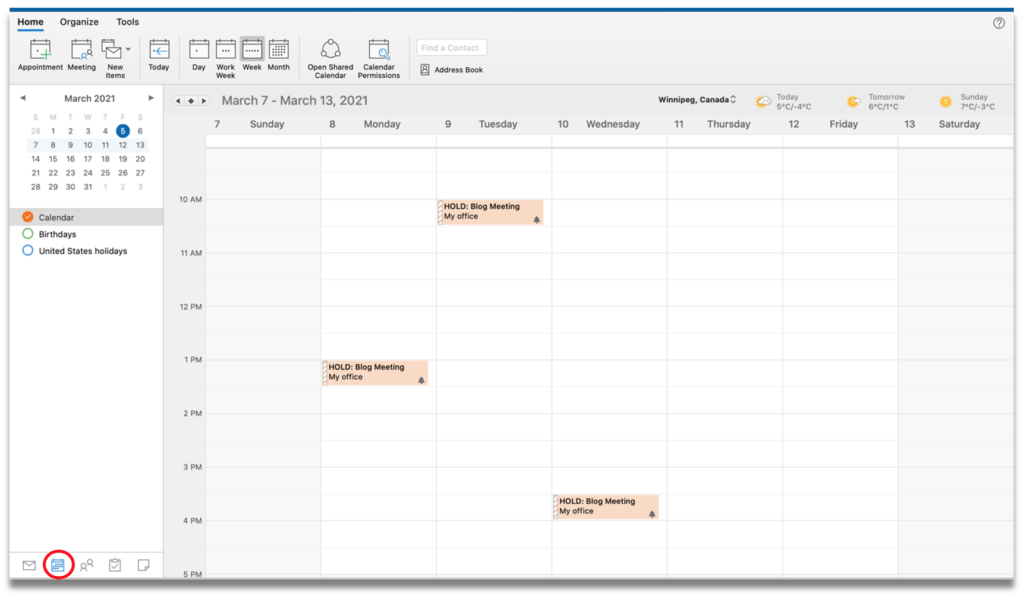
To see how FindTime holds meeting dates on your calendar, click the calendar icon in the left-hand panel on Outlook.
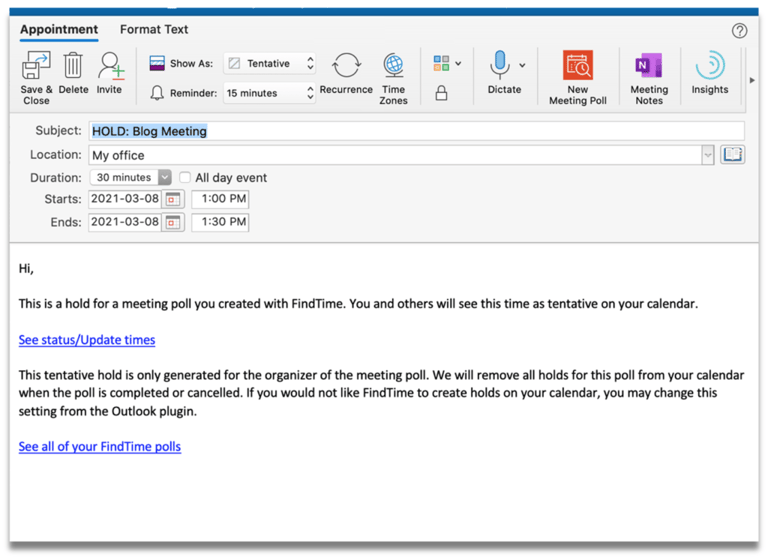
To manage proposed meeting times, add additional times, and see who’s voted, double click on one of the proposed slots in the calendar. The tentative event will open up in a new window. Then click on See status/Update times to check how attendees have voted.
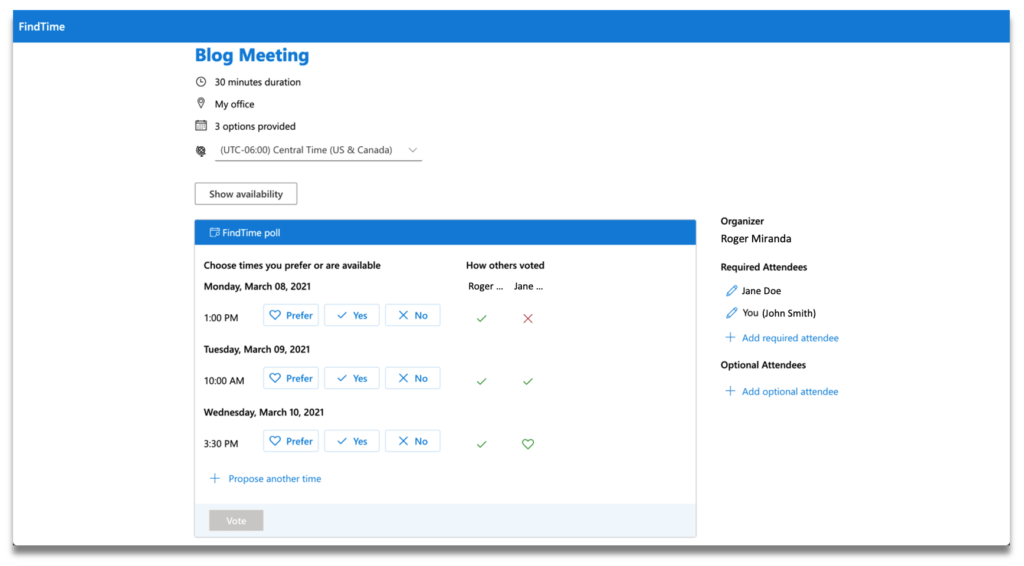
A window will open up in your web browser. You have the option to select each of the attendees to see how they cast their votes. For each suggested meeting time, attendees may select Prefer, Yes, or No. They may also propose another time and see how others voted.
On the right-hand side, attendees also have the option to add another required or optional person for the meeting.
If you selected Schedule when attendees reach consensus when setting up your poll, FindTime will remove all placeholders in your calendar and schedule the meeting that all attendees agreed on.
Final Words
Microsoft FindTime is a much-needed timesaver for 21st-century workplaces. It’s helpful, intuitive, and easy to use. No more outsourcing your polls to online services – everything you need to schedule meetings is built into this handy little add-in.
If you have any questions or would like to read about a specific topic or tool, let us know on social media. Thank you for reading, and happy scheduling!